Install a Connector Automatically within
To download a new connector from the website:- Open the Connections tab from the navigation bar.
- Click Add Connection to open the Select Connectors page.
- Select either the Sources tab or the Destinations tab, depending on which type of connector you want to create.
-
Locate the connector that you want to add and click the
 icon that appears at the end of the connector row. Clicking the icon opens the Install Connector dialog box.
-
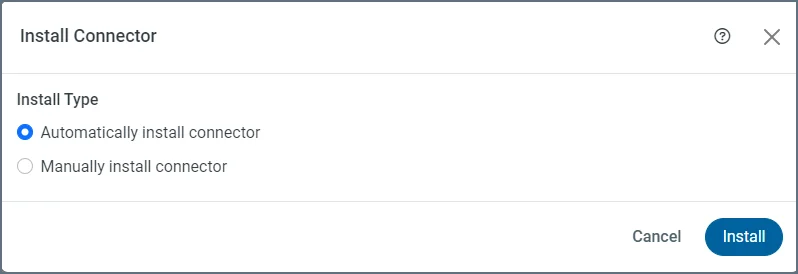
Select Automatically install connector. Then click Install.
To see a list of only connectors that you have installed, toggle the Only Installed switch to the right. (The switch is in the left corner above the connectors list.)
Install a Connector Manually by Using the Local File System
In addition to installing a connector from , you can manually install a new connector from a ZIP file that Technical Support can provide. To install a connector from a ZIP file:- Open the Connections tab from the navigation bar.
- Click Add Connection to open the Select Connectors page.
- Select either the Sources tab or the Destinations tab, depending on which type of connector you want to create.
-
Locate the connector that you want to add and click the icon that appears at the end of the connector row. Clicking the icon opens the Install Connector dialog box.
-
Select Manually install connector.
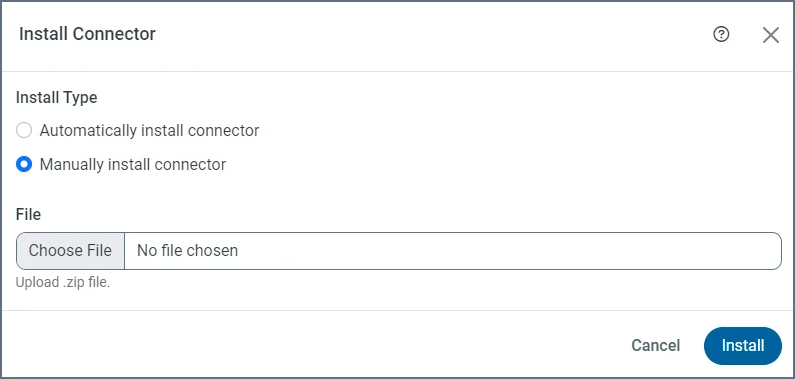
- Click Choose File and then select the ZIP file that you want to install. Then click Install. The Install Connector dialog box remains open until just before the installation completes. If the installation is successful, a message to that effect appears in the upper right of your Select Connectors page.
To see a list of only the connectors that you have installed, toggle the Only Installed switch to the right. (The switch is in the left corner above the connectors list.)
Copy a Connector to the libs Folder
To install a connector in thelibs directory:
- Extract the JAR file from the provided ZIP file.
-
Copy the JAR file into the
libsdirectory. The location of thelibsdirectory in is as follows:-
Microsoft Windows:
C:\ProgramData\{companyName}\{siteNameShortLower}\libs -
UNIX or Mac OS:
~/{companyNameLower}/{siteNameShortLower}/libs
-
Microsoft Windows:
- Restart the server.