2. Install dbt Core and the adapter plug-in for your destination on the same machine where {siteNameShort} is installed. Plug-ins are available for each of the destinations that are listed earlier.
3. Download your dbt projects locally by cloning your Git repository to your local machine. {siteNameShort} clones the repository upon setup and before each run to ensure that any changes to the project are reflected in the next run from {siteNameShort}.
4. Create a transformation in {siteNameShort} (using dbt projects that contain YML or SQL files), as described in the next section.
### Creating a DBT Transformation To create a dbt transformation: 1. Open {siteNameShort} and navigate to the **Transformations** page. 2. Select the job on which you want to run a transformation. Then, click **Add Transformations**. 3. Fill out the fields in the **Add Transformation** dialog box, as follows: * Name: Enter a name for your transformation. * Type: Select dbt Core as the transformation type. * Project Folder: Select one of the following options. The default option is Local.Local: Enter the path for your existing local project folder. For this option, you also need to enter your dbt project folder page in the Folder Path field.
* Github: Enter the URL for the project that you [created earlier in Git](#url). For this option, enter the following information: * Git Repository URL: Enter your Git repository URL in the form [https://github.com/](https://github.com/)Owner/Repository.git. * Token: Enter the personal access token that you [copied earlier in Git](#pat). * Destination Schema: Add a destination schema of your choice. 4. Click **Add Transformation**. ## dbt Cloud Details ### Connecting {siteName} to dbt Cloud *dbt Cloud* is an integrated development environment (IDE) in which you can write, run, and test code as well as manage version control in your dbt project from your browser (no command-line use is required). To connect to dbt Cloud: 1. Open the **Advanced** tab on the {siteNameShort} **Settings** page and navigate to the **dbt Cloud Settings** section. 2. Click the edit icon for that section to open the **dbt Cloud Settings** dialog box. 3. Enter your account identifier (Id) in the **dbt Cloud Settings** section. If you do not know your account Id, you can retrieve it as follows: 1. Login to your dbt Cloud Account Information Center. 2. Click your profile image and name at the bottom of the left menu pane. This action opens another menu. 3. Select **Your Profile > Account**. Your account Id appears in the **Account ID** field (in the **Account information** section), as shown below: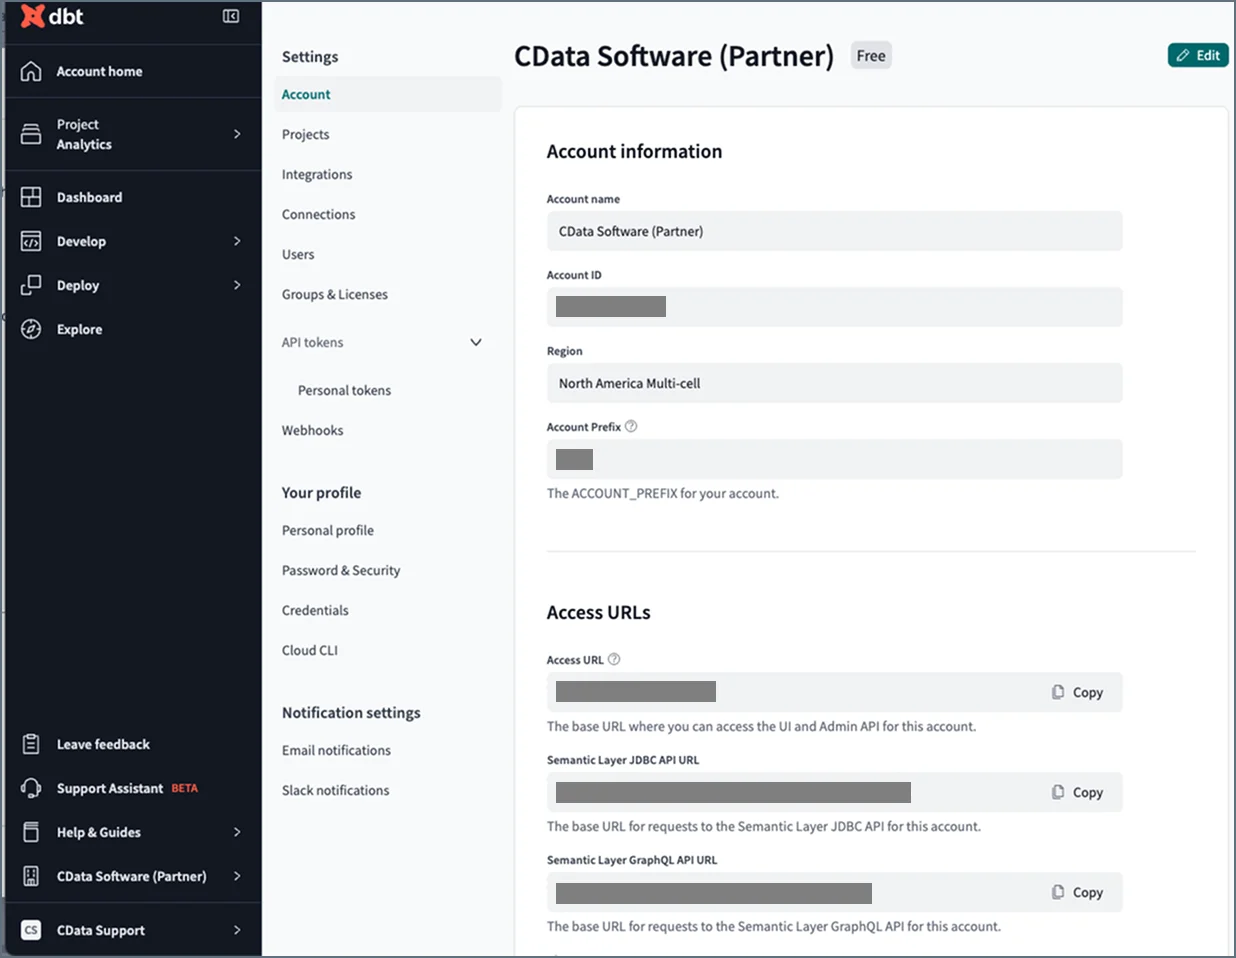 4. Enter either a dbt Cloud personal access token (PAT) or a service token in the **Token** field.
* If you do not have a PAT, you can create it by selecting **Account Settings > API Tokens > Personal Tokens** in your dbt Cloud Account Information Center. Copy the new token and return to {siteNameShort} to paste it into the **Token** field in the **dbt Cloud Settings** dialog box.
* If you do not have service token, you can create it by selecting **Account Settings > Service Tokens > New Token**. Copy the new token and return to {siteNameShort} to paste it into the **Token** field in the **dbt Cloud Settings** dialog box.
5. Enter your base URL in the **dbt Cloud Settings** dialog box.
4. Enter either a dbt Cloud personal access token (PAT) or a service token in the **Token** field.
* If you do not have a PAT, you can create it by selecting **Account Settings > API Tokens > Personal Tokens** in your dbt Cloud Account Information Center. Copy the new token and return to {siteNameShort} to paste it into the **Token** field in the **dbt Cloud Settings** dialog box.
* If you do not have service token, you can create it by selecting **Account Settings > Service Tokens > New Token**. Copy the new token and return to {siteNameShort} to paste it into the **Token** field in the **dbt Cloud Settings** dialog box.
5. Enter your base URL in the **dbt Cloud Settings** dialog box.

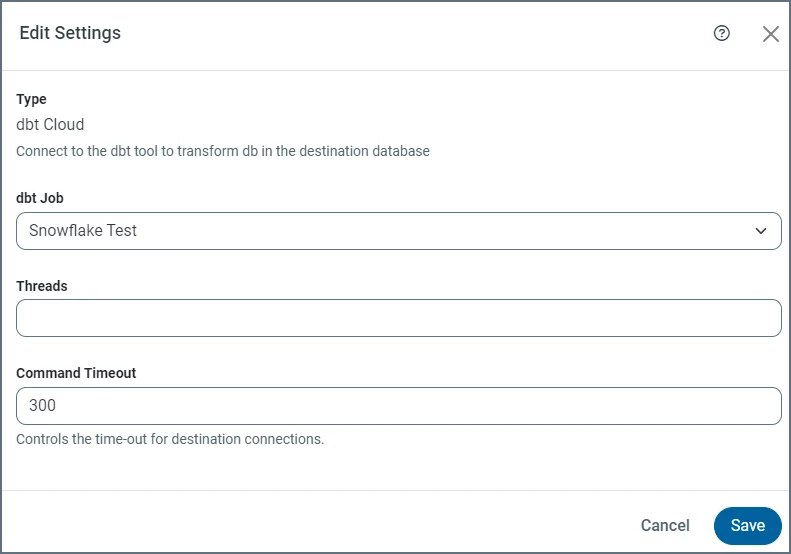 2. (Optional) Select **Enabled** if you want {siteNameShort} to retry the transformation if one or more tasks fail. Only failed tasks are re-executed.
3. Select a level for **Logfile Verbosity**.
4. Enter a timeout value in the **Command Timeout** field.
5. Click **Save**.
#### **Trigger** Category
The **Triggers** category enables you to set a specific schedule by which to run your transformation, as follows.
1. Click **Configure** in the **Triggers** category. This action opens the **Trigger** dialog box.
2. Specify the type of trigger that you want. You can select from the following types:
* None: Turns off scheduling options, allowing you to start a transformation manually.
* Scheduled: Enables you to set a specific schedule by which to run your transformation. This setting also activates the **Intervals** and **Minutes Past The Hour** fields. You can choose more granular settings for the **Intervals** setting:
* Minute: Activates the **Every** option where you can specify increments in minutes (every 10, 15, 20, or 30 minutes) in which to run your transformation.
* Hourly: Activates a **Minutes Past The Hour** field so you can set your transformation to run hourly at specific numbers of minutes past the hour (0-59). For example, you might want to run the transformation every hour at 15 minutes past the hour.
* Daily: Activates a **Time of Day** field so you can set the specific time each day that you want your transformation to run.
* Weekly: Activates two fields (**Days** and **Time of Day**) where you can specify a specific day of the week and time to run your transformation.
* Monthly: Activates **Day** and **Time** fields. However, for **Day**, you choose a specific day of each month (values of 1 through 31 or Last Day) along with the time.
* Cron: Activates a **Cron Statement** field where you can write a cron job to initiate a transformation run.
The **Scheduled** type is useful when you run multiple jobs. You cannot use the **After Job** option for multiple jobs because you cannot specify after which job to run the transformation.
* After Job: Activates a **Job** drop-down list that presents a list of all available jobs. You can choose the specific job after which you want the transformation to run.
You can also specify various tasks to run on your data by clicking **Select Specific Tasks** under the **Job** field. Simply select the task or tasks that you want to run.
3. Click **Save**.
2. (Optional) Select **Enabled** if you want {siteNameShort} to retry the transformation if one or more tasks fail. Only failed tasks are re-executed.
3. Select a level for **Logfile Verbosity**.
4. Enter a timeout value in the **Command Timeout** field.
5. Click **Save**.
#### **Trigger** Category
The **Triggers** category enables you to set a specific schedule by which to run your transformation, as follows.
1. Click **Configure** in the **Triggers** category. This action opens the **Trigger** dialog box.
2. Specify the type of trigger that you want. You can select from the following types:
* None: Turns off scheduling options, allowing you to start a transformation manually.
* Scheduled: Enables you to set a specific schedule by which to run your transformation. This setting also activates the **Intervals** and **Minutes Past The Hour** fields. You can choose more granular settings for the **Intervals** setting:
* Minute: Activates the **Every** option where you can specify increments in minutes (every 10, 15, 20, or 30 minutes) in which to run your transformation.
* Hourly: Activates a **Minutes Past The Hour** field so you can set your transformation to run hourly at specific numbers of minutes past the hour (0-59). For example, you might want to run the transformation every hour at 15 minutes past the hour.
* Daily: Activates a **Time of Day** field so you can set the specific time each day that you want your transformation to run.
* Weekly: Activates two fields (**Days** and **Time of Day**) where you can specify a specific day of the week and time to run your transformation.
* Monthly: Activates **Day** and **Time** fields. However, for **Day**, you choose a specific day of each month (values of 1 through 31 or Last Day) along with the time.
* Cron: Activates a **Cron Statement** field where you can write a cron job to initiate a transformation run.
The **Scheduled** type is useful when you run multiple jobs. You cannot use the **After Job** option for multiple jobs because you cannot specify after which job to run the transformation.
* After Job: Activates a **Job** drop-down list that presents a list of all available jobs. You can choose the specific job after which you want the transformation to run.
You can also specify various tasks to run on your data by clicking **Select Specific Tasks** under the **Job** field. Simply select the task or tasks that you want to run.
3. Click **Save**.
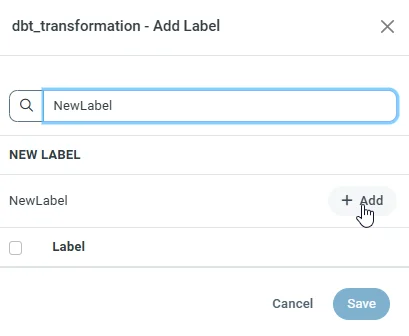 Then, the new label appears in the list of available labels, as shown below.
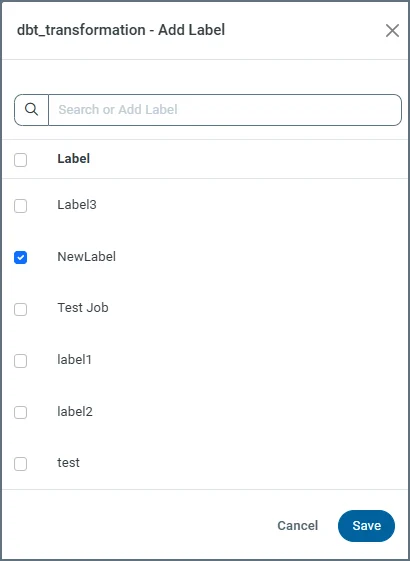 3. Click **Save**.
After you complete these steps, the new label appears in the **Labels** category box on the settings page.
#### **Notifications** Category
The **Notifications** category enables you to set email alerts for transformations, as follows.
1. Select **... > Edit** at the end of the transformation row for which you want to set alerts.
2. Click **Configure** in the **Notifications** category.
3. Set the following options in the **Notifications** dialog box:
* To: The email to which to send alerts.
* Subject: The subject for alert emails.
* Errors Only: An option that you can select to specify that alert emails should be sent only when the job encounters an error. If you do not select this option, {siteNameShort} sends alerts after each job run.
4. Click **Save**.
3. Click **Save**.
After you complete these steps, the new label appears in the **Labels** category box on the settings page.
#### **Notifications** Category
The **Notifications** category enables you to set email alerts for transformations, as follows.
1. Select **... > Edit** at the end of the transformation row for which you want to set alerts.
2. Click **Configure** in the **Notifications** category.
3. Set the following options in the **Notifications** dialog box:
* To: The email to which to send alerts.
* Subject: The subject for alert emails.
* Errors Only: An option that you can select to specify that alert emails should be sent only when the job encounters an error. If you do not select this option, {siteNameShort} sends alerts after each job run.
4. Click **Save**.