 ) icon that appears at the end of the row. When the connector installs successfully, you receive a message to that effect in the top right of the window.
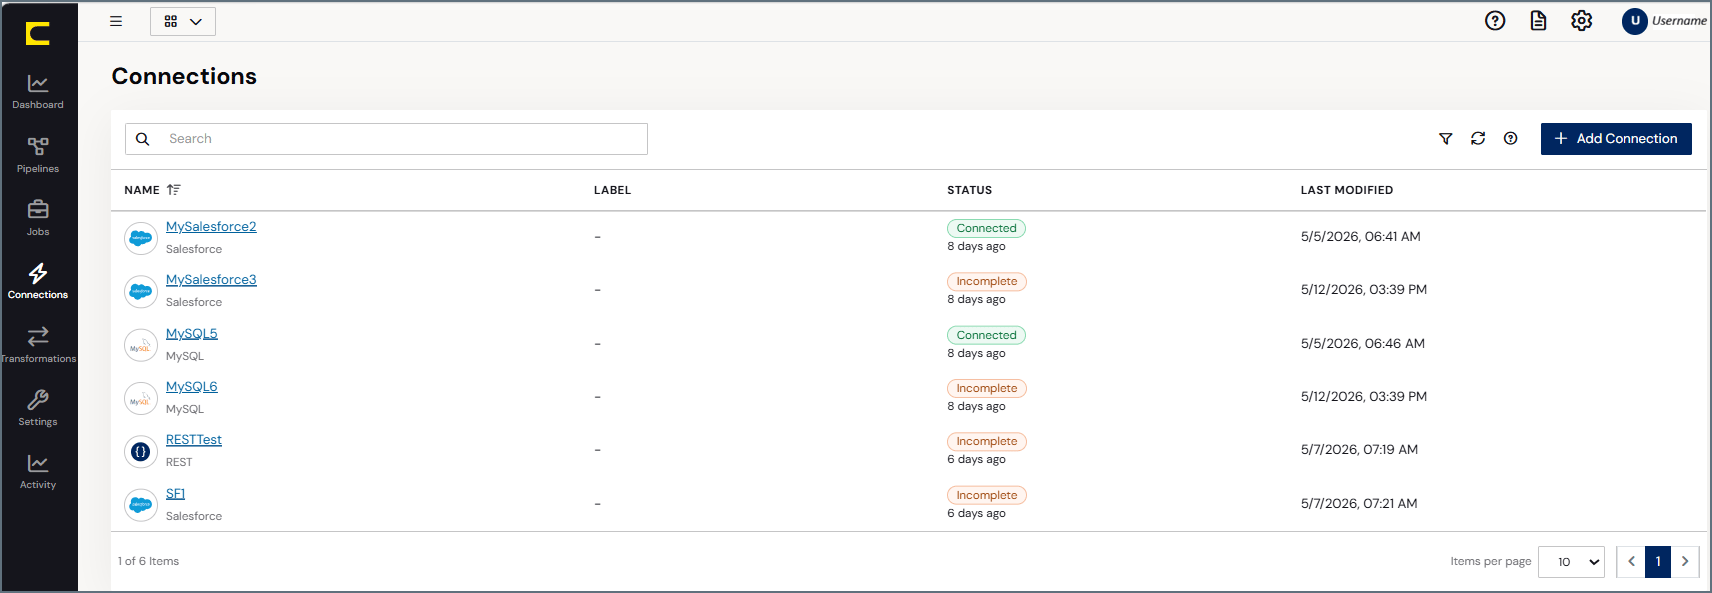 The connection records are displayed in rows, with columns that provide details about each connection. As shown above, you can specify the number of rows that you want to display on the page by selecting a number from the **X records per page** list at the bottom of the page.
{siteNameShort} provides details about your connections in four columns:
* **NAME:** Displays the connection name.
* **LABEL:** Displays any labels that you assign to your connection. You add labels in either of these ways:
* Select **. . . > Add Labels** at the end of the connection row.
* Click **Add Labels** in the **Labels** section on the **Overview** tab in the connection settings.
* **STATUS:** Lists the status of whether the connection was successful or whether it failed.
* **LAST MODIFIED:** Specifies the date and time that you last updated your connection.
If you click a connection name, {siteNameShort} displays the **Settings** page for that connection.
You can organize your connections list in ascending or descending order for the **NAME**, **STATUS**, or **LAST MODIFIED** columns. To order the columns, simply click the up (↑) and down (↓) arrows that are next to the column by which you want to sort.
In addition, you can filter the connections table by connection type and label. After you set filters, you can clear all filter options by clicking **Reset**. {siteNameShort} also enables you to save filters that you define so that you can use them later.
To add a filter:
1. Choose your filter options.
2. Select **Saved Filters > Add Saved Filter**.
The connection records are displayed in rows, with columns that provide details about each connection. As shown above, you can specify the number of rows that you want to display on the page by selecting a number from the **X records per page** list at the bottom of the page.
{siteNameShort} provides details about your connections in four columns:
* **NAME:** Displays the connection name.
* **LABEL:** Displays any labels that you assign to your connection. You add labels in either of these ways:
* Select **. . . > Add Labels** at the end of the connection row.
* Click **Add Labels** in the **Labels** section on the **Overview** tab in the connection settings.
* **STATUS:** Lists the status of whether the connection was successful or whether it failed.
* **LAST MODIFIED:** Specifies the date and time that you last updated your connection.
If you click a connection name, {siteNameShort} displays the **Settings** page for that connection.
You can organize your connections list in ascending or descending order for the **NAME**, **STATUS**, or **LAST MODIFIED** columns. To order the columns, simply click the up (↑) and down (↓) arrows that are next to the column by which you want to sort.
In addition, you can filter the connections table by connection type and label. After you set filters, you can clear all filter options by clicking **Reset**. {siteNameShort} also enables you to save filters that you define so that you can use them later.
To add a filter:
1. Choose your filter options.
2. Select **Saved Filters > Add Saved Filter**.
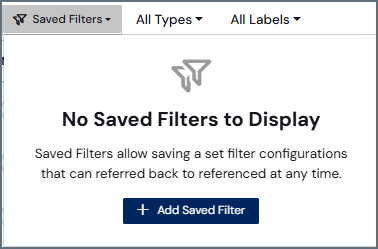 3. This selection opens the **Add Saved Filter** dialog box.
4. Enter a name for your filter. Then, click **Add Saved Filter** to save the filter and exit the dialog box.
3. This selection opens the **Add Saved Filter** dialog box.
4. Enter a name for your filter. Then, click **Add Saved Filter** to save the filter and exit the dialog box.
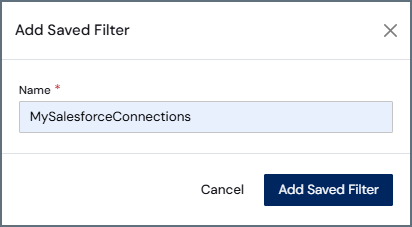 After you save the filter, its name appears in the **Saved Filter** list. Then, you can choose that filter from the list any time that you want to apply it.
## Adding a Connection
To add a connection:
1. Click **Connections** in the {siteNameShort} navigation bar to open the **Connections** page.
2. Click **Add Connection** to open the **Select Connectors** page.
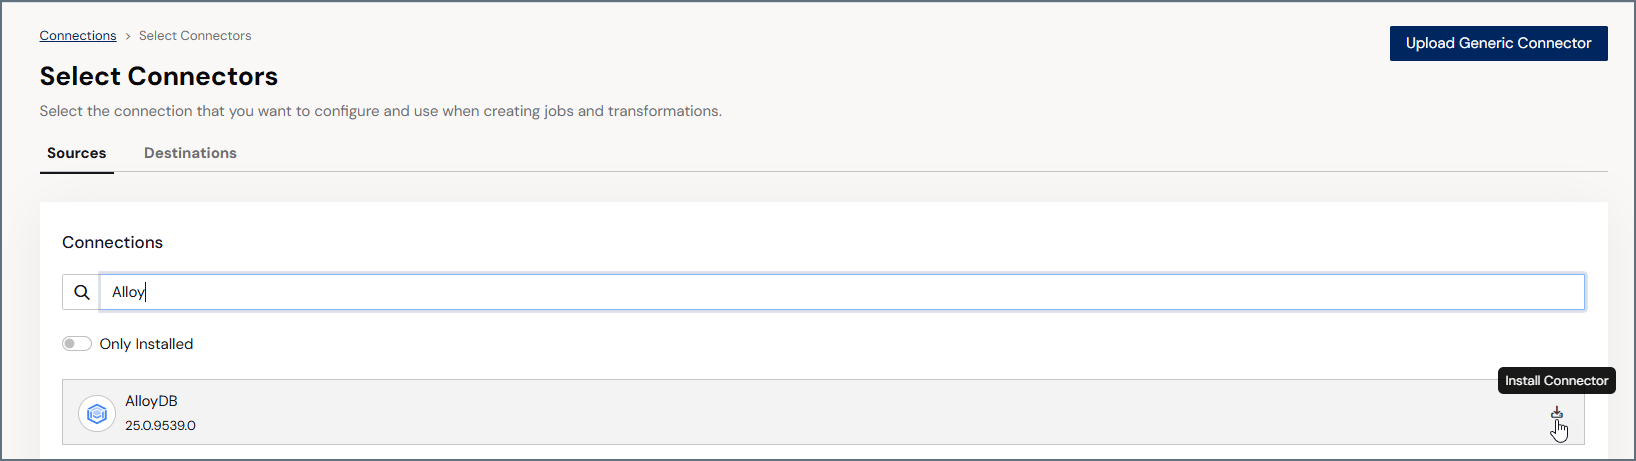
3. Click either the **Sources** tab or the **Destinations** tab, depending on the type of connector that you want to download.
4. Search for the connector that you want to add. Then, click the **Install Connector** () icon that appears at the end of the row. When the connector installs successfully, you receive a message to that effect in the top right of the window.
After you save the filter, its name appears in the **Saved Filter** list. Then, you can choose that filter from the list any time that you want to apply it.
## Adding a Connection
To add a connection:
1. Click **Connections** in the {siteNameShort} navigation bar to open the **Connections** page.
2. Click **Add Connection** to open the **Select Connectors** page.
3. Click either the **Sources** tab or the **Destinations** tab, depending on the type of connector that you want to download.
4. Search for the connector that you want to add. Then, click the **Install Connector** () icon that appears at the end of the row. When the connector installs successfully, you receive a message to that effect in the top right of the window.
You can control whether a connection uses the global proxy configuration or its own proxy or firewall settings. This behavior is managed by the Use Global Proxy Settings option on each connection.
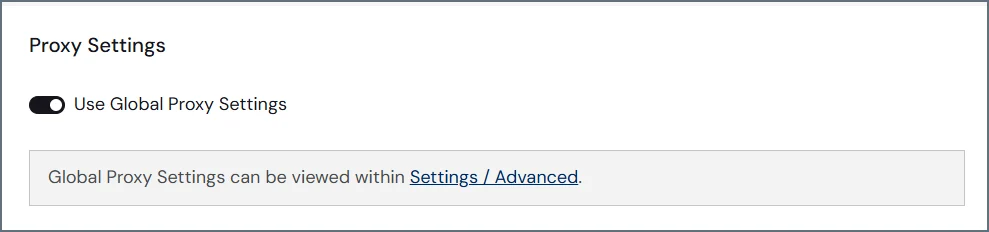
Depending on how this option is set, {siteNameShort} either applies the global proxy configuration and hides connection-level settings or displays and uses connection-specific proxy or firewall settings on the Advanced tab.
For new connections, the Use Global Proxy Settings option is enabled by default. For existing connections, it is disabled to preserve the current configuration.
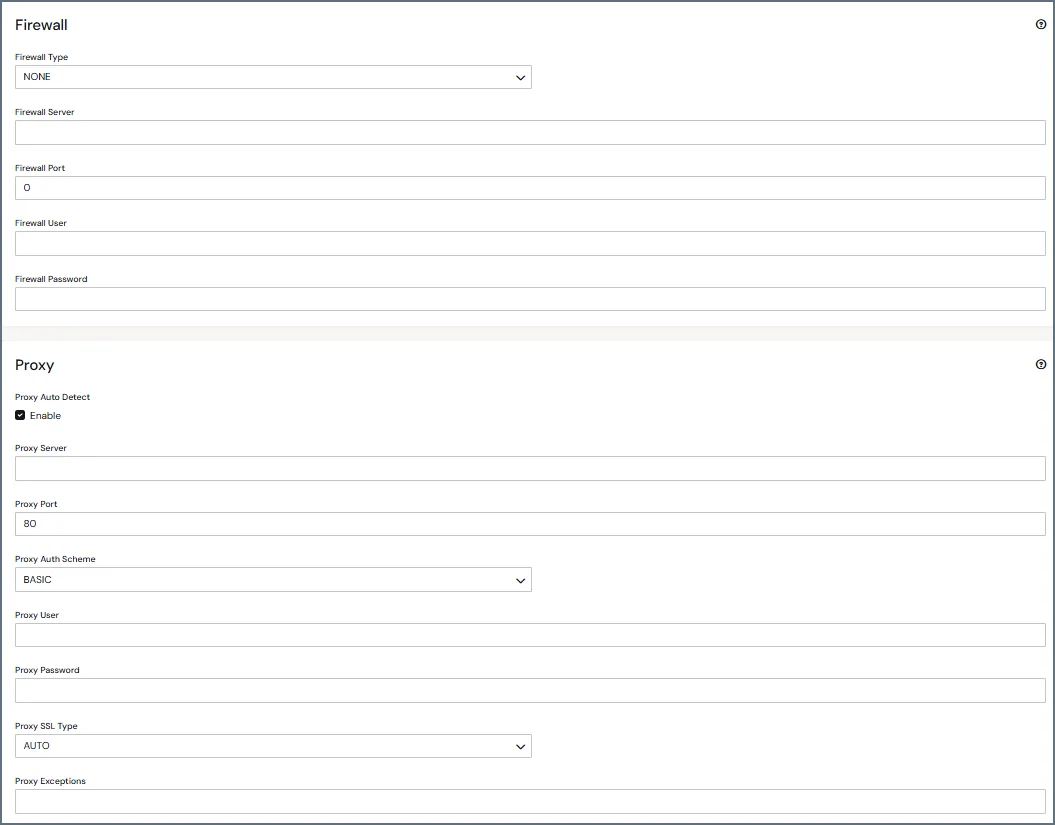 Proxy and Firewall settings are mutually exclusive. {siteNameShort} applies firewall settings when Type is set to TUNNEL, SOCKS4, or SOCKS5, and it applies proxy settings when Type is set to HTTP.
For information about global proxy and firewall settings, see Proxy Settings.
## Updating a Connection In {siteNameShort}, you can update a connection either by adding a new version or by selecting a different version, as explained below. Only users with the **cdata\_admin** role are authorized to update connections. To update a connection: 1. Click **Connections** in the {siteNameShort} navigation bar to open the **Connections** page. 2. For the connector that you want to update, click the options menu (**...**) at the end of that row and select **Update Connector**. This option opens the **Update Connector** dialog box.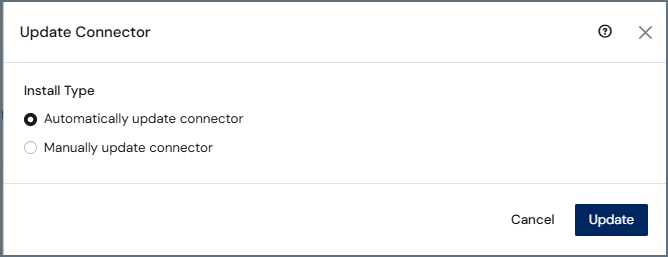 This dialog box lists the current version and displays two update options:
* **Select Version:** Provides a list of available connector versions in descending order. (You can change the order of the versions by clicking the arrow next to the **VERSION** column.)
This option enables you to select from the following items:
* all installed versions
* the latest downloadable version that is available from the website
**Notes:**
* If the selected version is not installed, it is downloaded and installed automatically from the website.
* All connections of that same type are updated to use the new version of the connector. However, when you create a new connection, {siteNameShort} always defaults to the latest available version, regardless of the versions that are used by other existing connections of the same type.
* If more than three versions of the same connector are installed, the latest version is deleted to maintain version control.
* **Add New Version:** Enables you to manually add a new connector version that is not yet listed. Select this option if you have obtained a connector version through an alternate method of distribution.
3. Select the update option that you want to use.
* **Select Version:** Select the version that you want to use from the list. Then, click **Update** (bottom right corner). When the update is complete, a message stating that it was successful is displayed in the top right corner of the {siteNameShort} window.
* **Add New Version:** Click **Choose File** to open an explorer window and select the file from which you want to download the new version, as shown below.
This dialog box lists the current version and displays two update options:
* **Select Version:** Provides a list of available connector versions in descending order. (You can change the order of the versions by clicking the arrow next to the **VERSION** column.)
This option enables you to select from the following items:
* all installed versions
* the latest downloadable version that is available from the website
**Notes:**
* If the selected version is not installed, it is downloaded and installed automatically from the website.
* All connections of that same type are updated to use the new version of the connector. However, when you create a new connection, {siteNameShort} always defaults to the latest available version, regardless of the versions that are used by other existing connections of the same type.
* If more than three versions of the same connector are installed, the latest version is deleted to maintain version control.
* **Add New Version:** Enables you to manually add a new connector version that is not yet listed. Select this option if you have obtained a connector version through an alternate method of distribution.
3. Select the update option that you want to use.
* **Select Version:** Select the version that you want to use from the list. Then, click **Update** (bottom right corner). When the update is complete, a message stating that it was successful is displayed in the top right corner of the {siteNameShort} window.
* **Add New Version:** Click **Choose File** to open an explorer window and select the file from which you want to download the new version, as shown below.
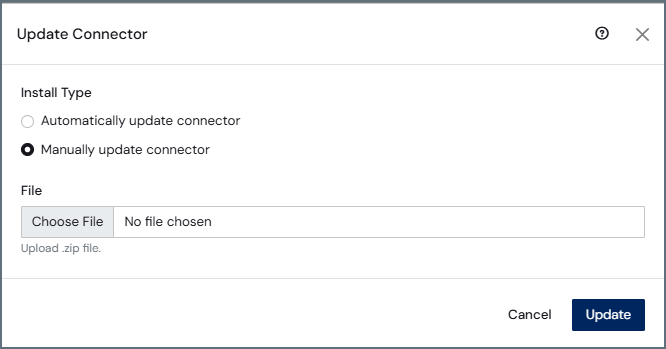 Then, click **Update** (bottom right corner). When the update is complete, the dialog box closes and a message stating that it was successful is displayed in the top right corner of the {siteNameShort} window.
The next time that you open the **Update Connector** dialog box, the new version appears at the top. The new version also appears at the top of your connection's properties page.
## Cloning a Connection
Instead of adding an entirely new connection, you can clone an existing one. Cloning creates a new connection by copying the settings and tasks from an existing connection.
To clone a connection:
1. Locate the connection that you want to clone and select **Clone** from the options menu (**...**). This option opens the **Clone Connection** dialog box, where you can define the connection that you want to clone.
2. Enter a name for your new connection. The **Type** category below the **Name** text box shows the name and the associated icon for the connection that you are cloning.
Then, click **Update** (bottom right corner). When the update is complete, the dialog box closes and a message stating that it was successful is displayed in the top right corner of the {siteNameShort} window.
The next time that you open the **Update Connector** dialog box, the new version appears at the top. The new version also appears at the top of your connection's properties page.
## Cloning a Connection
Instead of adding an entirely new connection, you can clone an existing one. Cloning creates a new connection by copying the settings and tasks from an existing connection.
To clone a connection:
1. Locate the connection that you want to clone and select **Clone** from the options menu (**...**). This option opens the **Clone Connection** dialog box, where you can define the connection that you want to clone.
2. Enter a name for your new connection. The **Type** category below the **Name** text box shows the name and the associated icon for the connection that you are cloning.
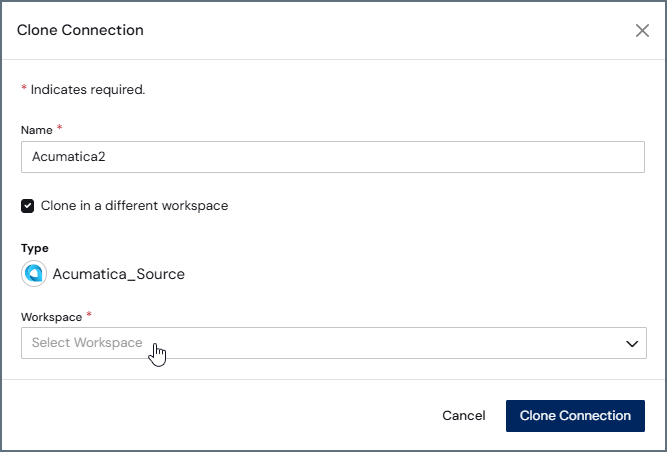 4. Click **Clone Connection** to clone your connection.
After you perform these steps, your cloned connection is displayed in the connections table on the **Connections** page.
If you want to change the configuration for your new connection, select **... > Edit** to open the configuration page for your new connection. This page contains four tabs: **Settings**, **Advanced**, **Logs**, and **Comments**.
1. On the **Settings** tab, define any settings that are not replicated via the cloning process (for example, **Server**) or modify any existing settings that you want to change. You can also add a connection label, set logfile verbosity, or define a refresh interval for the metadata cache from this page.
2. (Optional) Configure any additional settings that you want from the **Advanced** tab.
3. (Optional) Use the **Logs** tab to view, filter, or download logs.
4. (Optional) Add comments about your connection on the **Comments** tab. Each comment is saved with a timestamp for reference on that tab.
When you finish updating the settings:
1. Click **Test** in the top right of the window to verify that your connection settings are valid.
2. Click the **Update Connector** () icon to save and update your configuration.
## Removing a Connection
To remove a connection:
1. Select **... > Delete** for the connection that you want to remove. This selection opens the **Remove Connection** dialog box.
4. Click **Clone Connection** to clone your connection.
After you perform these steps, your cloned connection is displayed in the connections table on the **Connections** page.
If you want to change the configuration for your new connection, select **... > Edit** to open the configuration page for your new connection. This page contains four tabs: **Settings**, **Advanced**, **Logs**, and **Comments**.
1. On the **Settings** tab, define any settings that are not replicated via the cloning process (for example, **Server**) or modify any existing settings that you want to change. You can also add a connection label, set logfile verbosity, or define a refresh interval for the metadata cache from this page.
2. (Optional) Configure any additional settings that you want from the **Advanced** tab.
3. (Optional) Use the **Logs** tab to view, filter, or download logs.
4. (Optional) Add comments about your connection on the **Comments** tab. Each comment is saved with a timestamp for reference on that tab.
When you finish updating the settings:
1. Click **Test** in the top right of the window to verify that your connection settings are valid.
2. Click the **Update Connector** () icon to save and update your configuration.
## Removing a Connection
To remove a connection:
1. Select **... > Delete** for the connection that you want to remove. This selection opens the **Remove Connection** dialog box.
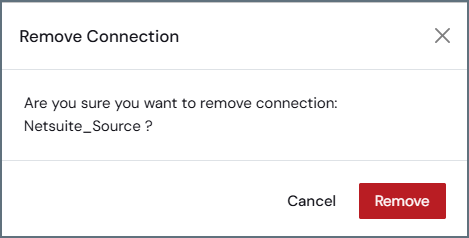 2. Click **Remove** to delete the connection permanently.
## More Information
See [**Connections**](../../connections/connections) for detailed information about the following topics:
* installing new connectors that are not part of your {siteNameShort} bundle
* connection documentation for specific sources and destinations
2. Click **Remove** to delete the connection permanently.
## More Information
See [**Connections**](../../connections/connections) for detailed information about the following topics:
* installing new connectors that are not part of your {siteNameShort} bundle
* connection documentation for specific sources and destinations