> ## Documentation Index
> Fetch the complete documentation index at: https://docs.sync.cdata.com/llms.txt
> Use this file to discover all available pages before exploring further.
# JDBC (Generic) Connector
export const siteNameShort = "Sync";
export const siteName = "CData Sync";
You can use a generic, third-party JDBC connector in {siteName} to capture data from databases that provide a JDBC driver but are not officially supported by CData. To do so, you must upload the driver, configure the connector, and complete your connection setup. This connector supports only sources and is limited to standard jobs.
## Add a Generic JDBC Connector
To enable {siteNameShort} to use a third-party JDBC driver, you first must add the connector, as follows:
1. Open the **Connections** page of the {siteNameShort} dashboard.
2. Click **Add Connection** to open the **Select Connectors** page.
3. On the **Sources** tab, click the **Upload Generic Connector** button. This button opens the **Upload Generic Connector** dialog box.
4. Click **Choose File** and select a driver file from your local machine.
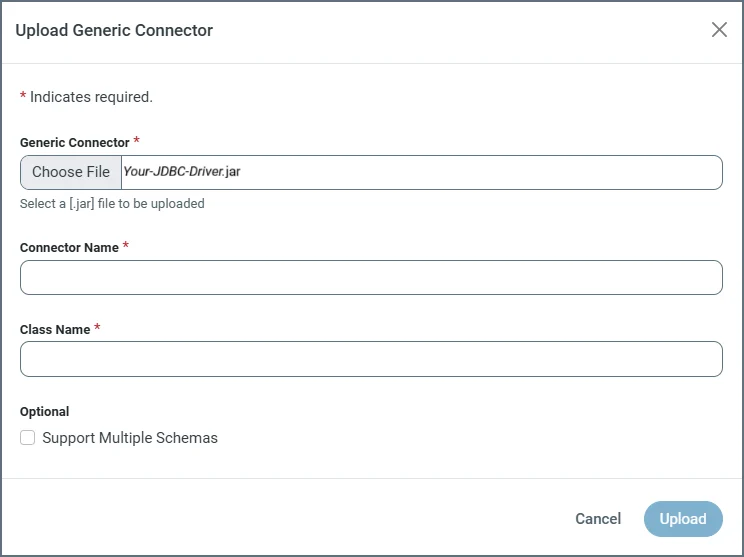 5. Specify the following properties:
* **Connector Name:** Enter a name of your choosing for your connector.
* **Class Name:** Enter the fully qualified Java class name of your JDBC driver (for example, `org.postgresql.Driver`, `oracle.jdbc.OracleDriver`, and so on).
* (Optional) **Support Multiple Schemas:** Select this checkbox to specify that your generic driver supports multiple schemas.
6. Click **Upload** to install and register the driver in {siteNameShort}.
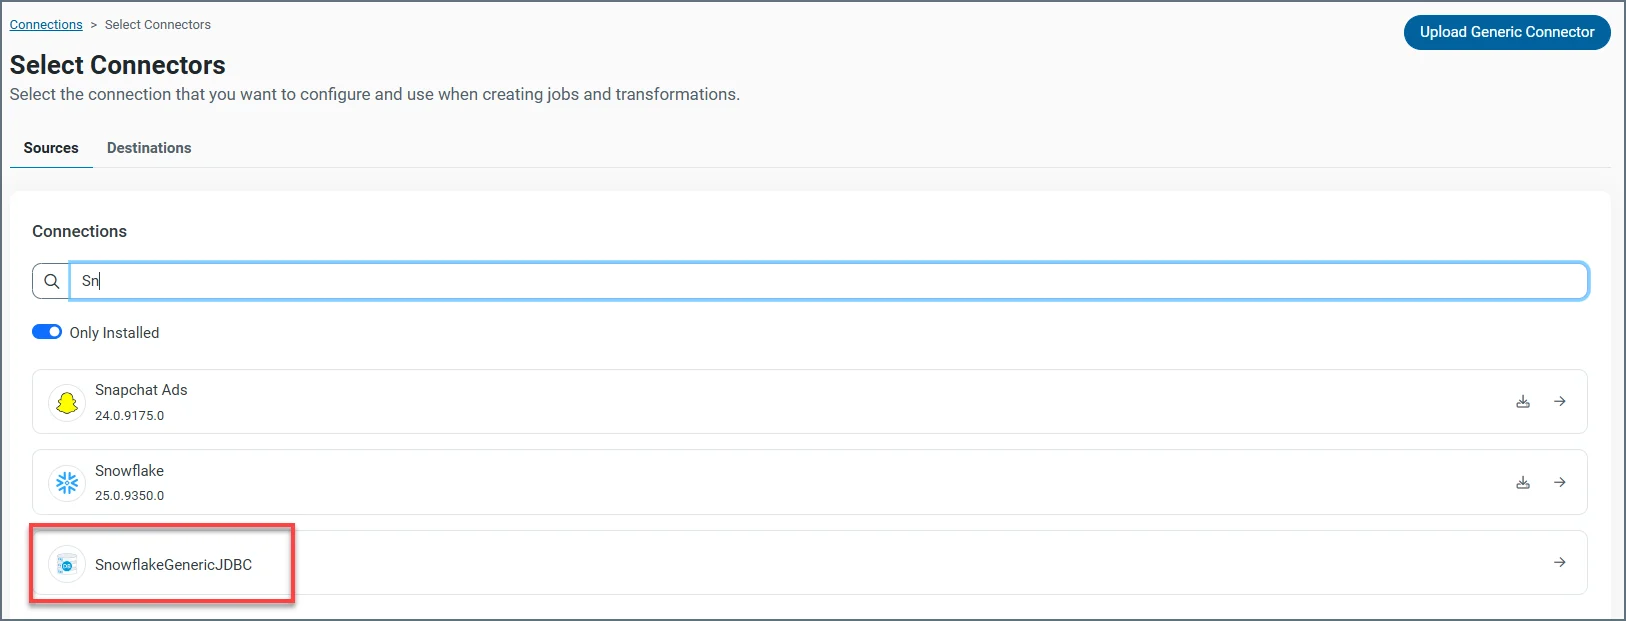
After you upload the driver, a generic JDBC connection appears in the **Sources** connector table, as shown in this example:
5. Specify the following properties:
* **Connector Name:** Enter a name of your choosing for your connector.
* **Class Name:** Enter the fully qualified Java class name of your JDBC driver (for example, `org.postgresql.Driver`, `oracle.jdbc.OracleDriver`, and so on).
* (Optional) **Support Multiple Schemas:** Select this checkbox to specify that your generic driver supports multiple schemas.
6. Click **Upload** to install and register the driver in {siteNameShort}.
After you upload the driver, a generic JDBC connection appears in the **Sources** connector table, as shown in this example:
 ## Authenticate Using Your JDBC Driver
After you add your driver, you need to set the required properties.
* **Connection Name:** Enter a connection name of your choice.
* **Connection String:** Enter the connection string that enables you to connect to your JDBC database.
**Example:**
```
jdbc:snowflake://.snowflakecomputing.com/?db=&schema=&warehouse=&user=&password=
```
## Complete Your Connection
To complete your connection, click **Create & Test** to save your connection and establish a test connection to verify your settings.
## Authenticate Using Your JDBC Driver
After you add your driver, you need to set the required properties.
* **Connection Name:** Enter a connection name of your choice.
* **Connection String:** Enter the connection string that enables you to connect to your JDBC database.
**Example:**
```
jdbc:snowflake://.snowflakecomputing.com/?db=&schema=&warehouse=&user=&password=
```
## Complete Your Connection
To complete your connection, click **Create & Test** to save your connection and establish a test connection to verify your settings.